


Electric Vehicle Charging Station Installation Guide: Everything You Need to Know
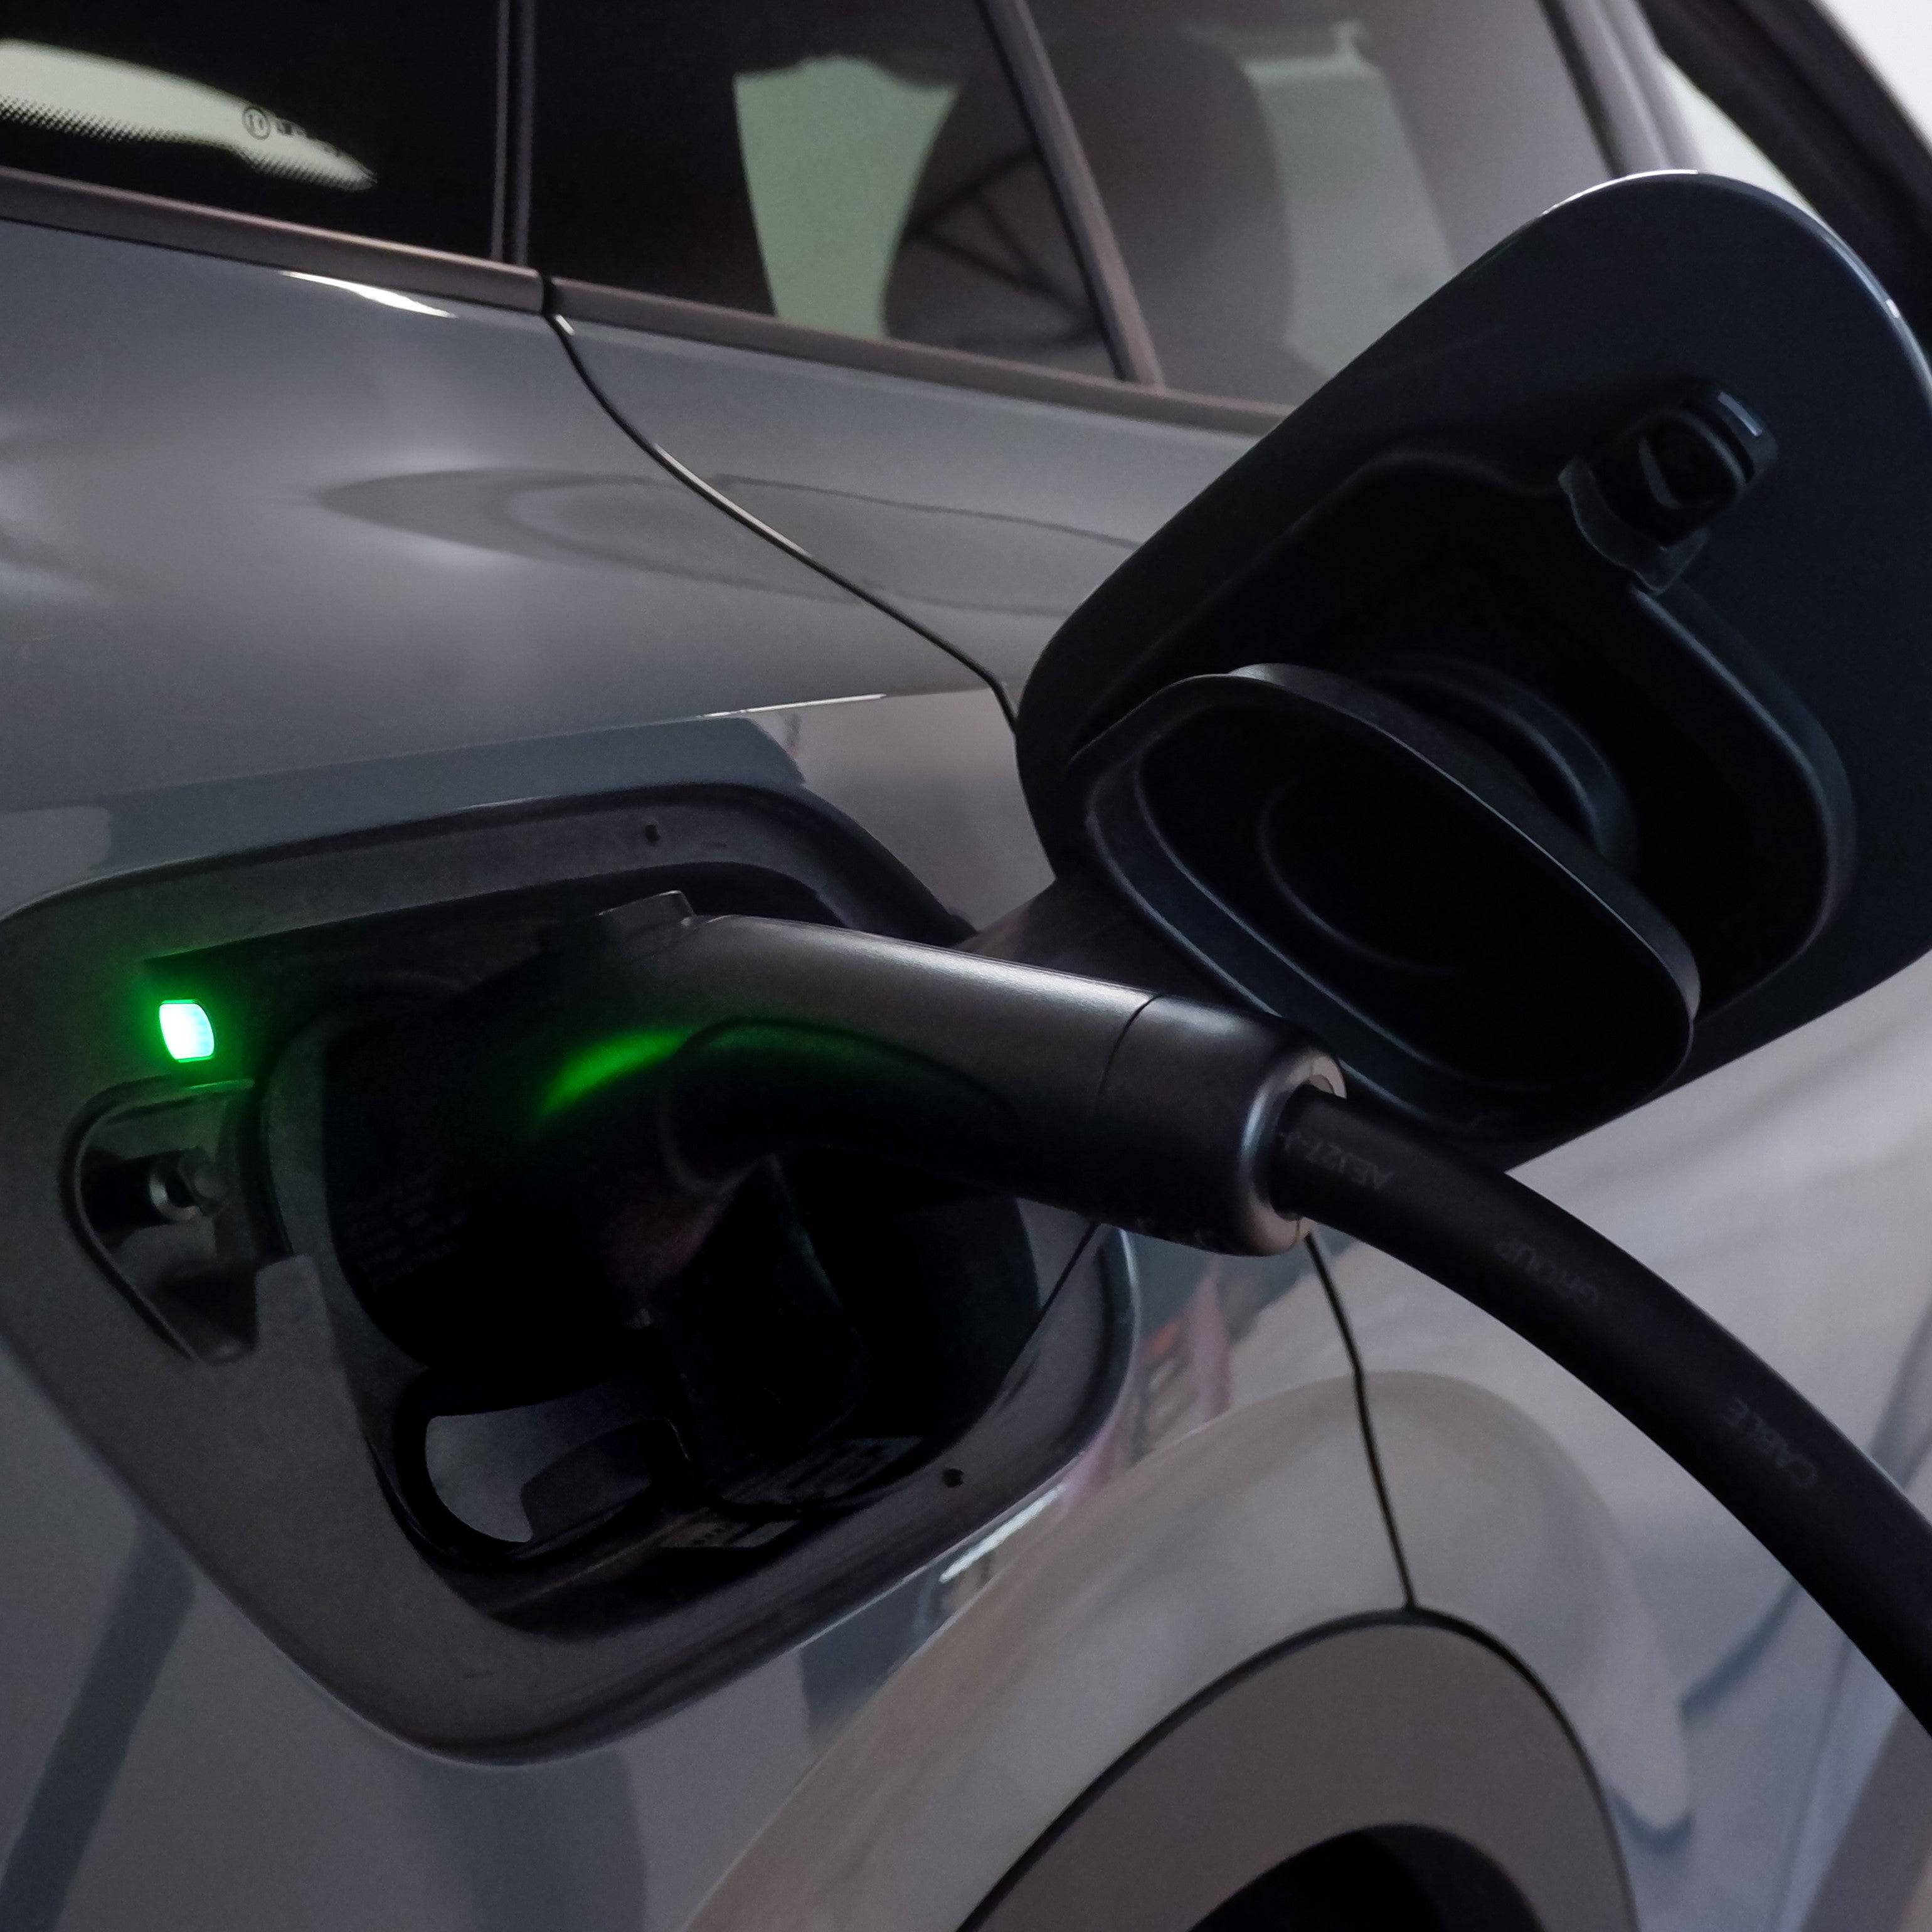
Installing a Level 2 EV charging station at home is one of the highest-value upgrades an electric vehicle owner can make. The math is simple: a standard 120-volt outlet delivers roughly 4 to 5 miles of range per hour of charging. A properly installed Level 2 station delivers 20 to 30 miles per hour — enough to fully replenish most EV batteries overnight, every night, without a second thought. This electric vehicle charging station installation guide walks through every stage of the process, from evaluating your electrical panel to mounting your charger and passing inspection. Whether you drive a daily commuter or a long-range crossover, the right home charging setup eliminates range anxiety before it starts.
Why a Dedicated Level 2 Charging Station Changes Everything
Most new EV owners begin with the included Level 1 trickle charger — a convenience cable that plugs into a standard household outlet. For low-mileage drivers, Level 1 charging is adequate. For anyone driving more than 30 to 40 miles per day, it becomes a constant logistical puzzle.
Level 2 charging operates on 240 volts, the same voltage used by electric dryers and ranges. The higher voltage combined with dedicated amperage means charge rates that are five to eight times faster than Level 1. A 40-amp Level 2 charger delivers approximately 9.6 kilowatts of power — enough to add 25 to 35 miles of range for every hour the vehicle is plugged in. For a 75 kWh battery depleted to 20 percent, that translates to a full charge in roughly seven hours: plug in at 10 p.m., drive a full battery at 6 a.m.
Beyond speed, a dedicated Level 2 station instills a charge-every-night habit that keeps the battery consistently topped up, reduces reliance on public charging infrastructure, and often qualifies homeowners for federal and state incentive programs that offset installation costs.
Understanding Electrical Requirements Before You Begin
The National Electrical Code mandates dedicated circuits for EV charging equipment, and for good reason — Level 2 chargers draw continuous current for extended periods. The NEC calculates continuous loads at 125 percent, which means the circuit must be rated above the charger's maximum draw.
The three most common Level 2 configurations follow this pattern:
- 32-amp charger: Requires a dedicated 40-amp, 240-volt circuit. Use 8 AWG copper wire for runs up to 100 feet from the panel. Delivers approximately 7.7 kW and 20 to 25 miles of range per hour.
- 40-amp charger: Requires a dedicated 50-amp, 240-volt circuit. Use 8 AWG copper wire for standard residential distances. Delivers approximately 9.6 kW and 25 to 35 miles of range per hour.
- 48-amp charger: Requires a dedicated 60-amp, 240-volt circuit. Use 6 AWG copper wire. Delivers approximately 11.5 kW and 30 to 40 miles of range per hour — the maximum most residential panels can support per circuit.
Before scheduling an electrician, assess your main electrical panel. A 200-amp service panel is the modern residential standard and can accommodate an EV charger circuit without issue in most cases. Older homes with 100-amp service may require a panel upgrade — a conversation worth having with a licensed electrician during the initial site assessment. If your panel has available breaker slots and sufficient remaining capacity, adding a 50-amp or 60-amp double-pole breaker is a straightforward job for a qualified professional.
Permit Requirements and Why They Matter
Nearly every jurisdiction in the United States requires an electrical permit for new circuit installations, including EV charger circuits. Pulling a permit is not bureaucratic friction — it is the mechanism that ensures your installation is inspected by a licensed electrical inspector who verifies code compliance. This protects your home, your family, and your investment.
An unpermitted electrical installation carries real consequences. Home insurance policies often exclude coverage for damage caused by unpermitted work. If you sell your home, an unpermitted EV circuit can surface during the buyer's inspection and create closing complications. Some utility rebate programs require proof of a permitted, inspected installation before disbursing funds.
The permit process is straightforward: your electrician pulls the permit before work begins, completes the installation, and schedules an inspection. Most jurisdictions complete residential electrical inspections within a few business days. The permit fee itself is typically $50 to $150 — a minor expense relative to the total project cost.
Choosing the Right Location for Your Charging Station
Location planning before installation prevents expensive retrofits later. The goal is a position that minimizes electrical run length, provides easy access to the vehicle's charging port, and keeps the cable organized and off the floor.
Start with proximity to the electrical panel. Every additional foot of wire run adds material cost and, in long runs, may require upgrading to larger gauge wire to manage voltage drop. A charger mounted on a garage wall adjacent to the panel keeps costs low and simplifies the electrician's work.
Next, consider where your vehicle parks relative to the charging port. Most EVs position the charging port on the driver's side front quarter panel or the rear of the vehicle. The charger should mount close enough that the cable reaches the port with slack to spare — typically 18 to 24 inches of free cable beyond what is needed to reach the port. A cable that is perpetually stretched taut wears faster and creates a trip hazard.
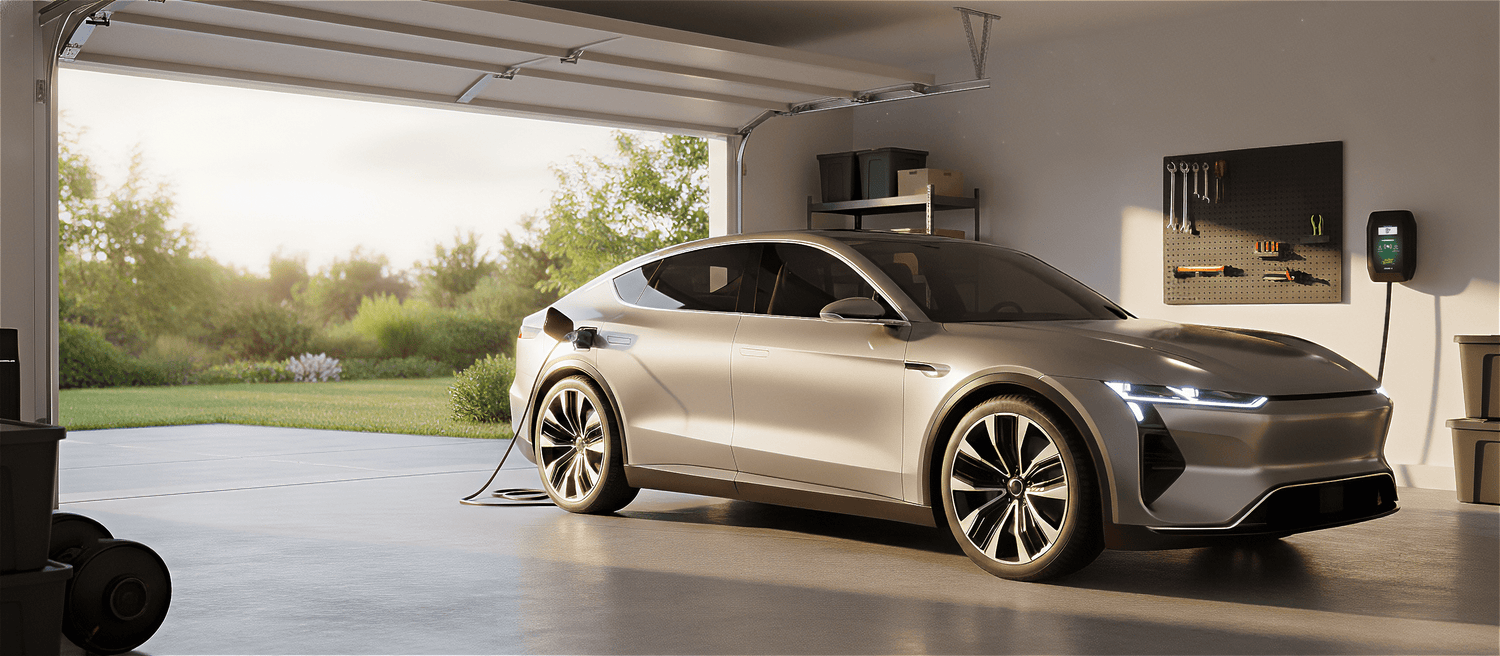
Mount height matters for daily convenience. Industry standard is 48 to 54 inches from the floor — high enough to keep the cable clear of the ground, low enough for easy connector handling. For garage installations, confirm the mounting surface is a structural wall capable of supporting the unit's weight.
Outdoor installations are viable with NEMA 4 or higher-rated enclosures and weatherproof conduit runs. If your parking situation is a driveway or carport rather than an enclosed garage, discuss outdoor-rated installation options with your electrician.
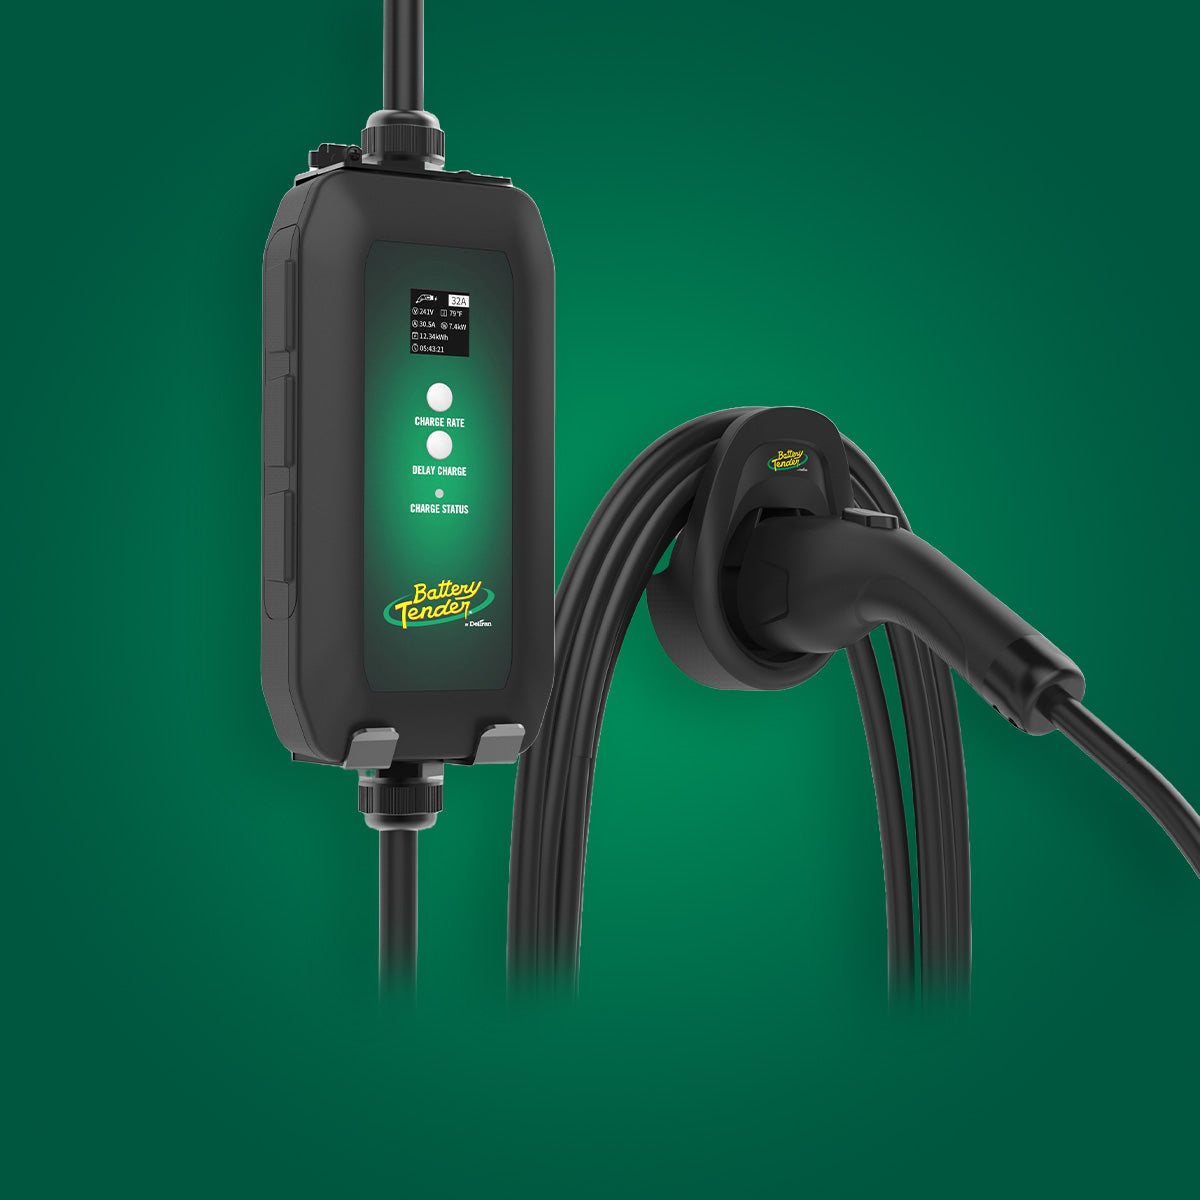
Battery Tender eCharge Level 2 Charger Models
Battery Tender® engineers the eCharge line specifically for residential installation, with specifications that align with standard electrical configurations and installation methods that accommodate both hardwired and plug-in setups.
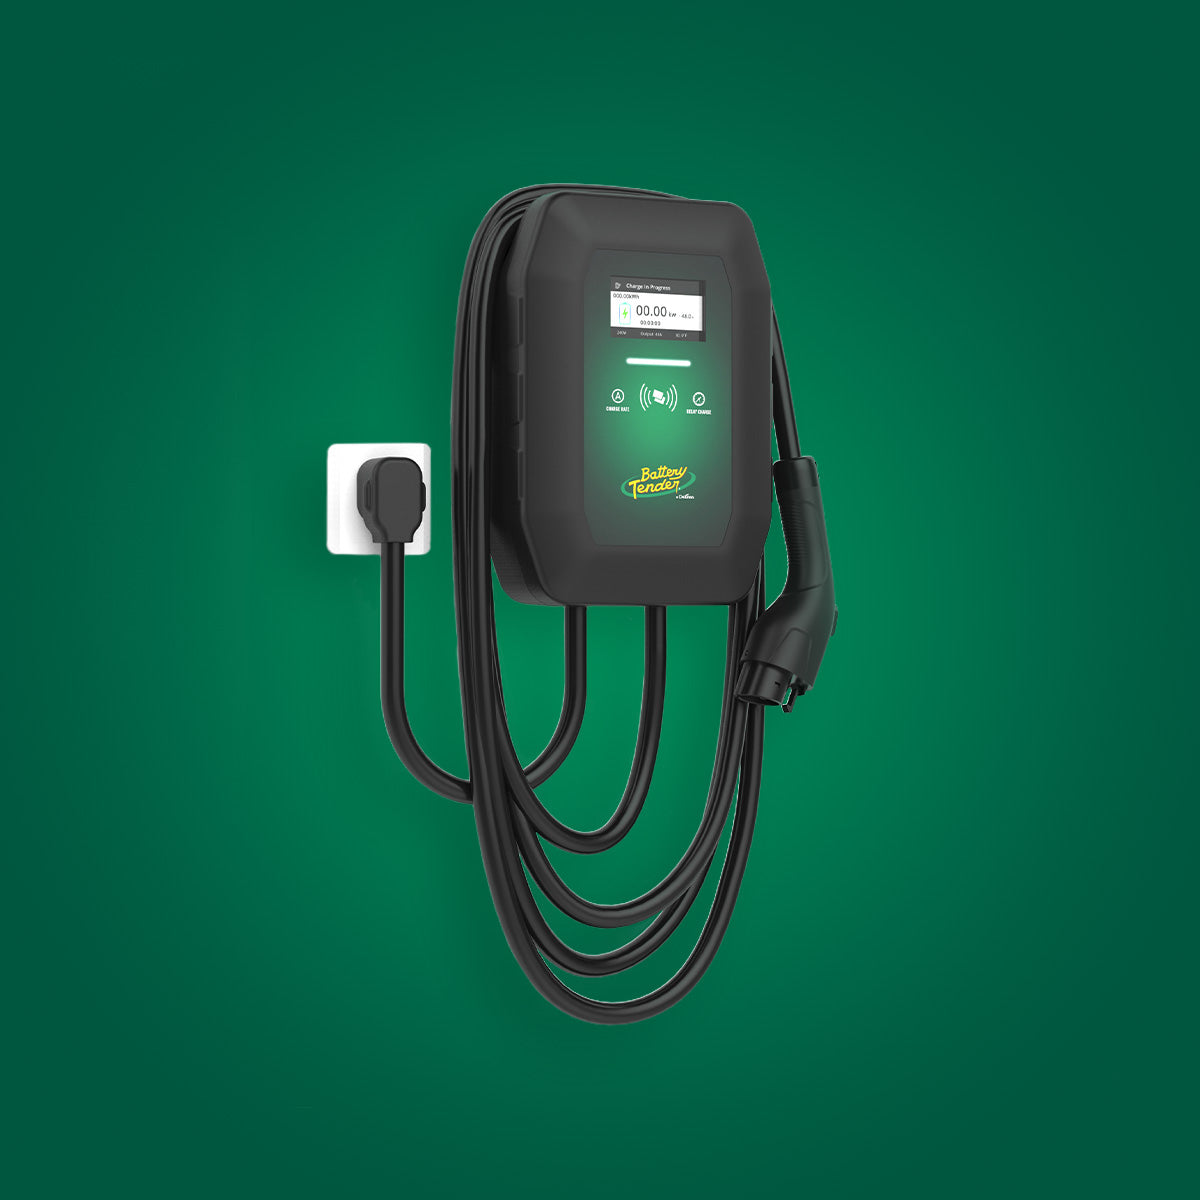
The Battery Tender eCharge 40 AMP Level 2 Mountable EV Charger installs on a standard 50-amp, 240-volt dedicated circuit — the most common EV charger circuit in residential construction and the configuration most electricians can add to a modern 200-amp panel without complications. At 9.6 kW, it delivers 25 to 35 miles of range per hour and handles overnight charging for the full range of current production EVs. It supports both hardwired connection and NEMA 14-50 plug connection, giving installers flexibility based on local code and personal preference. Mounting hardware and detailed installation instructions are included.
For vehicles capable of accepting higher charge rates, the Battery Tender eCharge 48 AMP Level 2 Mountable EV Charger delivers 11.5 kW on a 60-amp dedicated circuit. This is the appropriate choice for larger battery packs — long-range variants of popular EVs with 100 kWh or larger batteries — where the higher charge rate meaningfully reduces charge time. Like the 40-amp model, it supports hardwired or NEMA 14-50 plug installation.
Drivers who need charging flexibility at home and on the road should consider the Battery Tender eCharge 32 AMP Level 1+2 Portable EV Charger. This dual-voltage portable unit operates as a Level 2 charger at 240 volts on a 40-amp circuit, or plugs into a standard 120-volt outlet for Level 1 charging when 240-volt power is unavailable. It is the practical solution for EV owners who travel frequently, own vacation properties, or want a capable backup charging option without installing a second hardwired unit.
The Installation Process: What to Expect
A typical residential Level 2 EV charger installation by a licensed electrician proceeds through several predictable stages. Understanding the sequence helps homeowners coordinate efficiently and avoid delays.
Site assessment: The electrician evaluates panel capacity, identifies the optimal circuit route, confirms mounting location, and provides a written estimate. This visit typically takes 30 to 60 minutes and is often free or credited toward the installation cost.
Permit application: The electrician submits the permit application to the local building department. Most jurisdictions process residential electrical permits within one to three business days.
Installation day: The electrician installs the new double-pole breaker in the main panel, runs conduit and wire from the panel to the charger mounting location, mounts the charger, and makes final connections. For a straightforward garage installation with the panel in an adjacent utility area, the work takes two to four hours. Longer conduit runs, concrete walls, or outdoor installations add time.
Inspection: The electrician schedules the electrical inspection. The inspector verifies breaker sizing, wire gauge, conduit installation, and proper bonding. Passing inspection closes the permit.
Total cost: Expect $300 to $800 in labor and materials for a standard residential installation in most U.S. markets, not including the charger hardware itself. Panel upgrades, long conduit runs, and outdoor weatherproofing add to this baseline.
Maximizing Value: Incentives and Rebates
Federal, state, and utility incentive programs frequently offset a significant portion of EV charger installation costs. The federal residential clean energy credit has historically covered a percentage of EV charging equipment and installation costs — confirm current eligibility and limits with a tax professional, as program terms change annually.
Many electric utilities offer direct rebates for residential Level 2 charger installation, ranging from $100 to $500 or more depending on the utility and program year. Some utilities also offer time-of-use rate programs that allow EV owners to charge at significantly reduced overnight electricity rates — scheduling overnight charging at off-peak hours can cut charging costs by 30 to 50 percent compared to daytime rates.
State programs vary widely. Several states offer additional tax credits or rebates stacked on top of federal and utility programs. Researching all available incentives before purchasing equipment and scheduling installation maximizes total savings.
Frequently Asked Questions
Do I need a permit to install a Level 2 EV charger at home?
Yes, in virtually every U.S. jurisdiction. Installing a Level 2 EV charger requires adding a new dedicated 240-volt circuit, which is a permitted electrical project requiring inspection. Your licensed electrician pulls the permit and schedules the inspection as part of the installation process. Skipping the permit creates liability and insurance risks and can complicate home sales.
Can I install a Level 2 EV charger myself?
The physical mounting of the charger unit is straightforward, but the electrical work — running a new 240-volt dedicated circuit, installing a double-pole breaker, and making panel connections — must be performed by a licensed electrician in most jurisdictions. DIY electrical panel work without a license typically voids permits and may void homeowner's insurance coverage. Hire a licensed electrician for the circuit work.
How long does Level 2 EV charger installation take?
Most residential installations take two to four hours on installation day, assuming the panel is in the garage or adjacent space and no major conduit routing challenges exist. Including the permit process, plan for five to ten business days from initial contact with an electrician to completed, inspected installation.
What is the difference between hardwired and plug-in charger installation?
A hardwired charger connects directly to the electrical circuit with no plug or outlet. A plug-in installation uses a NEMA 14-50 outlet mounted on the wall, and the charger connects via a matching plug. Both are code-compliant with proper installation. Plug-in installation allows the charger to be relocated or replaced without an electrician. Hardwired installation eliminates the outlet as a potential failure point. Battery Tender eCharge Level 2 chargers support both configurations.
How much does it cost to charge an EV at home with a Level 2 charger?
Home charging cost depends on local electricity rates and battery size. At the U.S. average residential rate of approximately $0.16 per kWh, fully charging a 75 kWh battery from empty costs roughly $12. Most EV owners do not charge from empty — daily top-offs of 20 to 40 kWh are more common, costing $3 to $6 per session at average rates. Time-of-use overnight rates available from many utilities can reduce this cost further.
Conclusion
A properly installed Level 2 home charging station is the infrastructure foundation of EV ownership. This electric vehicle charging station installation guide covers the core decisions — circuit sizing, permit compliance, location selection, and charger model — that determine whether your installation goes smoothly or generates expensive surprises. The process is well-defined, the technology is mature, and the daily quality-of-life improvement is immediate.
Battery Tender eCharge Level 2 chargers are built for exactly this application: reliable, high-rate residential charging with installation flexibility for both hardwired and plug-in configurations. The eCharge 40 AMP Level 2 Mountable EV Charger handles the majority of residential applications on a standard 50-amp circuit. The eCharge 48 AMP Level 2 Mountable EV Charger delivers maximum residential charge rates for large-battery vehicles. And the eCharge 32 AMP Level 1+2 Portable EV Charger provides dual-voltage flexibility for drivers who charge in multiple locations. Schedule your site assessment, pull your permit, and wake up every morning to a full battery.